In the spirit of "New Year; New You!" I've built my website on a new platform which has an integrated Blog platform.
To kick off the new Blog, I've written a blog post about my paints and palettes and how I've found and acquired some of my favorites.
Find new blog location and first blog post here.
Paints, Palettes and Pigments!
Hop on over to my website and check it out. You'll have to subscribe to a new RSS feed if that is how you receive my posts over here at Blogger.
nmdart.com

1.18.2017

12.12.2016
Creation from Destruction
 nmdart.com
Here is my newly finished studio sign. I really love the way it turned out.
As many of my projects, it was months in the creation, though actual time spent is far, far less. I probably put about two hours into making and assembling the components.
It all started when our household (and studio-hold) goods arrived in Florida summer 2015. I had a pair of tables from my grandparents' house. They have continually lost more and more of the decorative skirt that made me so fond of them. This move, however, resulted in the top cracked through and a broken leg.
Here is a photo of the remaining one, which is in better shape, (ha ha).

Being a packrat, I decided to disassemble the broken table. I'm saving the pieces of the skirt. Eventually, I'll use them to make one whole skirt on the remaining table. I think the turned spool legs will make nice candlesticks. That left me with the top. I thought it would make a great sign.
Previously, I have applied vinyl lettering to my studio wall. Considering the number of places that I have had a studio, it makes considerably more sense to have a portable sign. I could even take it to shows if that becomes a need!
Materials:
Table top (or similar box-shaped crate/drawer)
Table leg or newel
paint
foil or tin
two eye hooks
two hooks
two D-rings
picture-hanging wire
rubber tubing (I used 1/4")
wooden skewers or dowels that will fit in tubing
hot glue gun
glue sticks
scissors
vinyl lettering or more paint

First, I painted the table top and leg with some chalk paint that I had. My favorite watercolor brushes have a red stripe, so I accented it with red. I used heavy duty aluminum foil to make the ferrule, but I wish I had purchased some tin. (I may redo this part at some point.)

I put D-rings on the back and ran picture-hanging wire across so that the sign will hang flat against the wall.
Now, to make the brush tip!
The end of the table leg I used already had a hole, so I used a dowel to give the bristles a starting place and stability:

I cut the tubing into the desired lengths. (I started at about 14", but by the end of the project, I liked the bristles closer to 9," so I wasted a lot of tubing.)
I applied hot glue to my barbecue skewers (cut in half) and pushed the into the tubing until the ends were flush. Then, I glued them to each other around the center dowel/tube shown above.

I just went around and around until the whole square leg would be covered. I trimmed the "bristles" at an angle and shaped them into the round brush shape that I desired and then hot-glued the whole brush tip into/onto the leg.

I applied my name in vinyl lettering to the sign portion (from Single Stone Studios on Etsy) and put it onto the wall.
It's fun and quirky; I love it!

10.01.2016

9.29.2016
Day #3 of 3: Gulf Fritillary

Hanging On
8" X 8"
$100
The Gulf Fritillary is a common butterfly in the Keys. In fact, it is found in all counties in Florida. It's long wings can carry it over the Gulf of Mexico to spend winters in the Caribbean and South America. It lays its eggs on passionflower plants, but enjoys nectar from many other species. The adult butterfly has glands on its abdomen that release a smelly chemical that keeps predators at bay.

I did not take the photo above. Although I see Gulf Fritillary butterflies often, I rarely have more than my iphone and haven't yet gotten a great photo to work from. I found this lovely image on Wikipedia; it is credited to Bob Peterson and was taken in North Palm Beach. You can see many other of his nature photos on Flickr and Tumblr (Wildflower Power).

The second photo is the photo of the flowers I used in the painting. I don't know the name of this wild vine, but I liked the delicate blossoms. I took it walking neighborhood trails when we lived in Northern Virginia.
Below is the work in progress slideshow:
9.28.2016
Day #2 of 3: Gulf Fritillary

The background of vines and leaves are pretty close to finished in this photo. Next, I'll remove the masking fluid and finish the butterfly and blooms.
9.27.2016
Day #1 of 3: Gulf Fritillary
The thirty paintings in thirty days challenge is drawing to a close and I've started my sixth butterfly painting. I may continue the series in the coming months. I still have a lot of images I would like to paint.
This butterfly is the Gulf Fritillary that lives here in the Keys. I placed it on flowers that I photographed in the woods of Virginia. I thought the blooms looked a lot like the beach poppies around here, if they were climbing a sea grape or something.


The flowers in my reference photo are the palest of pink, so I masked them completely. I am not sure what color I will end up painting them yet. Come back tomorrow (or the next day) and see what happened.
9.26.2016
Day #3 of 3: Pink Cattleheart

Over the Andes
5" X 7"
$85
The Pink Cattleheart butterfly is a forest butterfly found in Central and South America from Mexico, through Costa Rica and Ecuador to Peru. Due to this location it is also called the Transandean Cattleheart.
Typically, the butterfly has five red patches on its hindwing. You can see that the one I photographed (below) only has four with a gap. I only found this out reading about the species, but I find it even more special now!
The caterpillars feed on pipevine, which makes them poisonous to predators.

This butterfly was at the Key West Butterfly and Nature Conservancy. It is a lovely space, but my photos leave a lot to be desired. I think I need to take the "good camera" and return soon. Besides many lovely butterflies, there are (among other birds) adorable button quail, turacos, and a pair of flamingoes!
Here is the slideshow of the art in progress:
9.25.2016
Day #2 of 3: Pink Cattleheart

I'm having a lot of fun with the leafy background. The butterfly has a long way to go at this point, but since he is mostly black, it should go quickly.
You may have guessed that this painting is smaller than the others I've done this month. Yes, this one is 5" X 7." I drew it to paint on my trip, but didn't. Rather than let it go to waste, I'm painting it now.
9.24.2016
Day #1 of 3: Pink Cattleheart


It's day 24 in the 30 day Thirty in Thirty paint everyday challenge. I'm beginning watercolor number five. Although this is far less than the 24th painting I could have been doing today, I am glad I am participating and I am very pleased with what I've painted.
Come back tomorrow for the next work in progress painting.
9.23.2016
Day #4 and #5 of 5: Orange Julia

Passion for Flowers
11" X 14"
$230
The Orange Julia (dryas ulia) is mainly found in the Amazon, but also in south Texas and southern Florida. It is in the Heliconian (long-winged) family, so it loves the passion flower.
The butterflies in my painting are male, which have less black on the the wings than the females. Males seek mineral rich water from many places, including the sandy banks along rivers, salt licks, and even from the eyes of animals like turtles and caiman! Both males and females have a specialized proboscis (tongue) for this purpose. Females don't seek the same thing though; they like dissolved pollen rather than minerals!
Here is a slideshow of the painting's development:

Below are my reference photos in a collage.

9.22.2016
Day #3 of 5: Orange Julia

I'm at about the halfway point in my painting of the Orange Julia. Much more painting ahead.
Come back tomorrow for the finished painting.
9.21.2016
Day #1 and #2 of 5: Orange Julia
Painting number four is of two Orange Julia butterflies and quite a few flowers. I combined several photos for a rather fantastical composition. It has more detail than the previous paintings. This wasn't the best of planning, since I'm trying to catch up! Come back tomorrow for another "work in progress" shot and on Friday for the completed painting.


9.20.2016
Day #4 and #5 of 5: Great Yellow Mormon
Have you missed me? I've been out of town taking down my exhibit, Natural Focus, that has been up since late June at the Johnson Center for the Arts. I took a leisurely trip home, visiting friends, shelling on Sanibel and Captiva islands, and taking an airboat ride in the Everglades! I'm home now and back in the studio, albeit five days behind in my goals for the #thirtyinthirty #30in30 painting challenge.
To get back on schedule, I will be posting days #1 and #2 of each remaining painting together (the sketch and the first wash). I will also combine days #4 and #5 to show the finished painting, the reference photos and a slideshow along with a quick slideshow and information about the butterfly, until I've caught up.
Here is the completed painting for the Great Yellow Mormon:
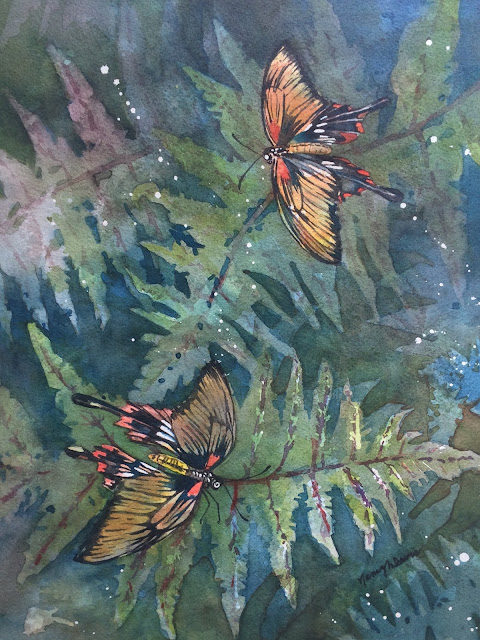
Below is a slideshow video of the paintings development and below that, the reference photos that I started the painting with...

To get back on schedule, I will be posting days #1 and #2 of each remaining painting together (the sketch and the first wash). I will also combine days #4 and #5 to show the finished painting, the reference photos and a slideshow along with a quick slideshow and information about the butterfly, until I've caught up.
Here is the completed painting for the Great Yellow Mormon:
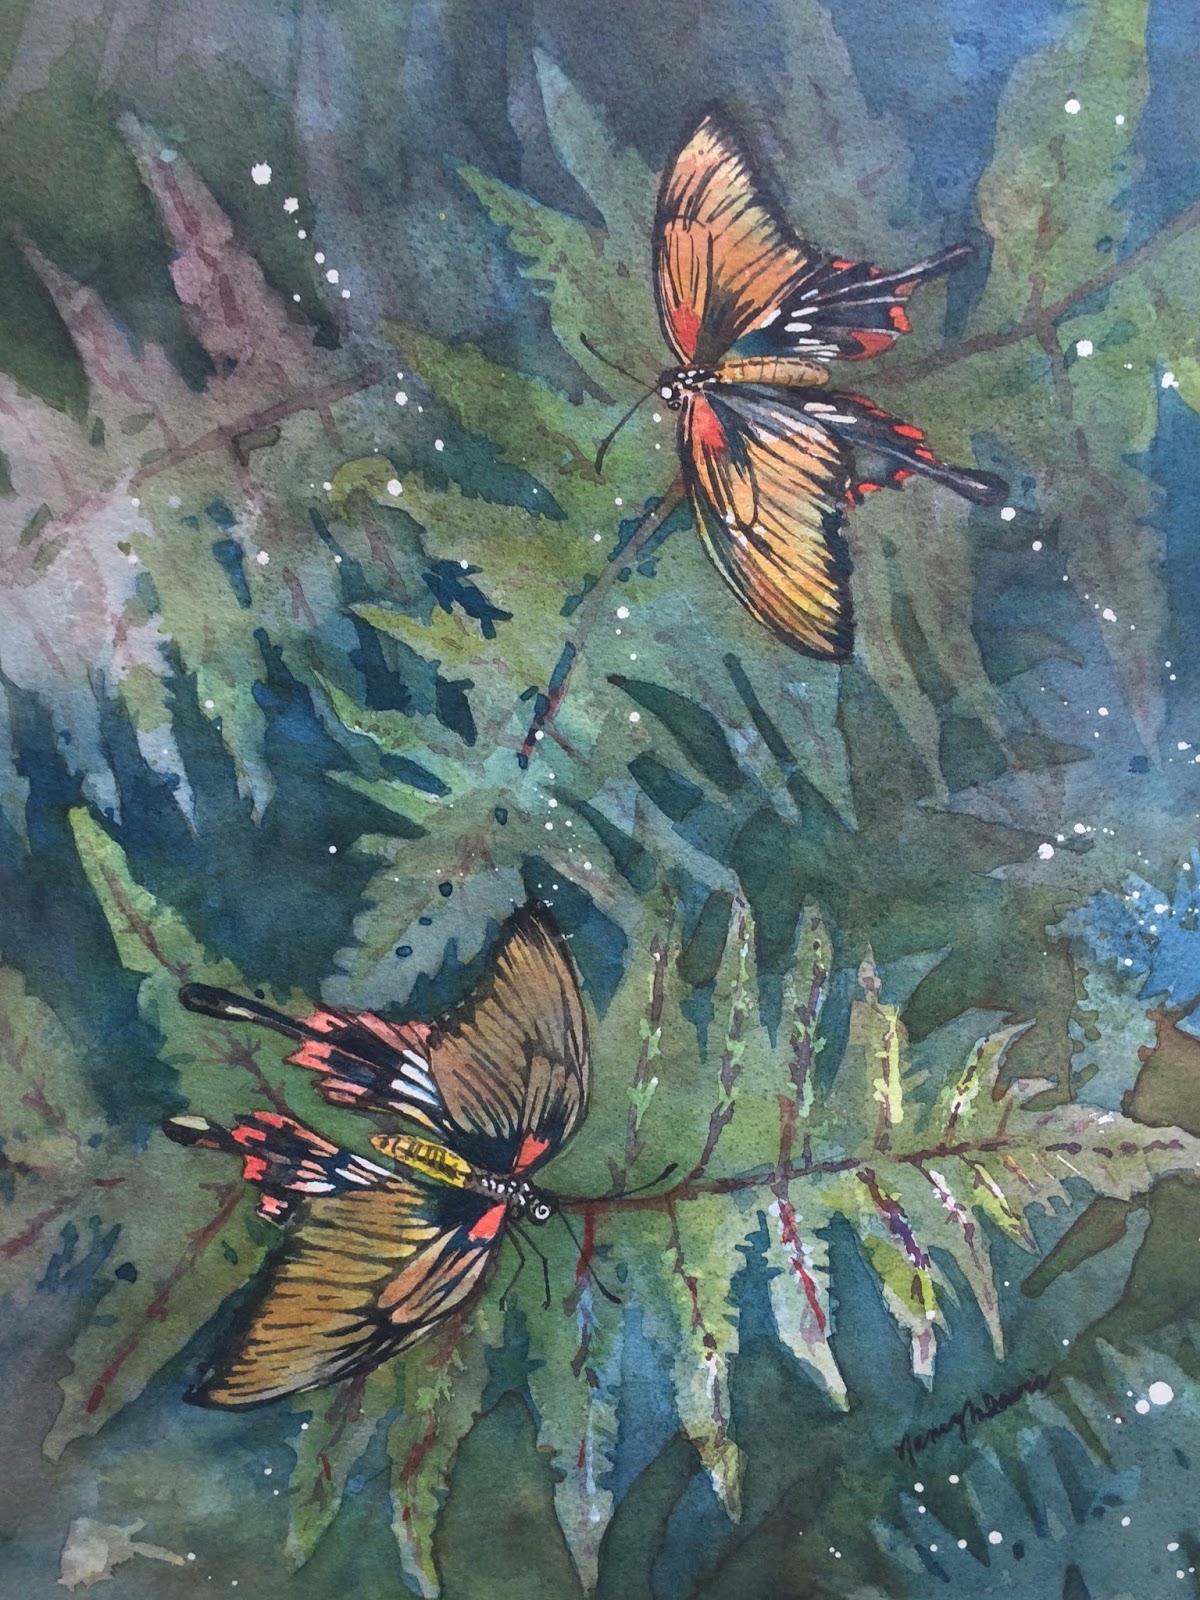
Sunset Ladies
11" X 14"
$230
This butterfly species is dimorphic. That means that that males and females look different. There is a lot of variation even between females, which the two in the painting are. They are found in the forests of the Philippines, Borneo and Indonesia. It is also called the Sunset Swallowtail and the Asian Swallowtail.
Below is a slideshow video of the paintings development and below that, the reference photos that I started the painting with...

9.13.2016
Day #3 of 5: Great Yellow Mormon

It seems that the last two paintings I've worked at least some on the butterfly/butterflies by this point, but today was all about working on the background via negative painting.
If you are not familiar with negative painting, it is a technique where you paint around a shape rather than paint the shape itself (the negative space), in this case, the fern leaves. I plan to add additional layers going under the fern leaves that are there already. I find this method gives depth to a painting in a way that my old background methods never did.
I will be painting back into the leaves as I get further along. I'm not sure if that will be before or after I remove the masking fluid yet, but I think it is coming along well. See you tomorrow!
9.12.2016
Day #2 of 5: Great Yellow Mormon

I have so much fun at this stage of the painting. It's a bit like doing finger painting or doing non-objective painting, but I do "plan" where the colors go to some extent. I choose the the lightest or brightest color that will go in an area and get it on the paper. Tomorrow, you will see how I use negative painting to define the shapes and colors.
I'm going to repeat below the process that I described in previous weeks in case you are visiting here for the first time. If you read it the previous two times I posted it, you can skip it. Nothing has changed.
Needed:
Paper - Arches 140# cold press
Masking Fluid
Paint - In this case only Antwerp Blue, Joe's Red and Bumblebee Yellow, but I premix into six dishes

Spray Bottle with water
Straw
Finger
First, I mask off white and yellow areas with removable masking fluid.
Then, I spritz the paper lightly and randomly with water. Next, I dribble paint. I give some consideration to where colors will be in the finished product, but I don't have a firm plan at this point. In the case of the butterflies, I did make sure to put orange there. I use a straw to blow the paint around. I use my large brushes and my finger to move puddles of color together to blend in some places. Finger painting! Fun!
9.11.2016
Day #1 of 5: Great Yellow Mormon

Time to show the beginning of butterfly painting number three!
I love ferns! I often use ferns in printmaking. I find them a relaxing and peaceful plant. I'm not sure if I associate them with relaxing in the shade or if the shape of the frond uses its fibonnaci magic on my brain!

I photographed these Great Yellow Mormon butterflies in the Smithsonian Museum of Natural History Museum when we lived in Northern Virginia. Our family went to the District for the day and our son's girlfriend came along too. I noticed that she seemed very nervous when the butterflies landed on her. I asked her if she was afraid of them. She explained, "Have you ever noticed what butterflies would look like apart from their wings? They are kind of creepy." To be honest, I hadn't given that much thought, but I like many bugs, so I would not be the type to find them scary....unless they could bite me.
9.10.2016
Day #5 of 5: Dark Blue Tiger

The Dark Blue Tiger butterfly is found primarily in the Himalayas and Southern India. It migrates to avoid typhoons. Caterpillars feed on stapf, which has blooms eerily shaped like the background plant in my painting. The Dark Blue Tiger has spot that can range from blue to white on a brownish-black to black field. Obviously, the white on brown one that I photographed seems odd to be called a "blue" butterfly, but that's how it goes sometimes!
This butterfly is a female. I know this because males have visible scent glands on the hind wing, which this butterfly lacks. These butterflies are toxic to birds and lizards. In large quantity, they can cause heart attacks!
9.09.2016
Day #4 of 5: Dark Blue Tiger

Dark Blue Tiger
11" X 14"
$230
Here is my second finished butterfly painting of the thirty paintings in thirty day challenge.
I ended up adding a little black (not sure what pigment) to get the darkest darks, which I rarely do. I was tempted to keep painting in a few areas, but my main complaint in most paintings is that I got too tight, so I made an effort to put it in the focal point and to suggest other shapes and textures.
Tomorrow will be the butterfly species information.
9.08.2016
Day #3 of 5: Dark Blue Tiger

I hope you enjoy seeing work in progress. I always find it fascinating to see how other people paint.
Up to the point above, I was staying with my three paint limited palette, but I was not satisfied with periwinkle or coral colors I was mixing. I knew that quinacridone coral would be an improvement to what I had happening. I also knew that a cobalt blue mixed with one of the quinacridone pink or magenta would make a better blue-purple that was more what I wanted.
Below, I will show details of those areas a bit further along in the process.


Come back tomorrow for the finished painting!
9.07.2016
Day #2 of 5: Dark Blue Tiger

If you weren't here for Day #2 of 5 last week, my process details are below:
I learned this method in February (2016) from Lian Quan Zhen.As with most things I am taught, the more I use it, the more my methods deviate from my instructor and become my own.
Needed:
Paper - Arches 140# cold press
Masking Fluid
Paint - In this case only Antwerp Blue, Joe's Red and Bumblebee Yellow, but I premix into six dishes
Spray Bottle with water
Straw
Finger
First, I mask off white and yellow areas with removable masking fluid.
Then, I spritz the paper lightly and randomly with water. Next, I dribble paint. I give some consideration to where colors will be in the finished product, but I don't have a firm plan at this point. In the case of the butterflies, I did make sure to put orange there. I use a straw to blow the paint around. I use my large brushes and my finger to move puddles of color together to blend in some places.
It makes a great foundation for negative painting in many areas moving forward.
Subscribe to:
Posts (Atom)